Sunday, June 29, 2014

Sunday Favourites: Base Coats

Hey everyone,

I've used a few different base coats since I started doing my nails, starting off ages ago not using any base coat at all! (which is something I do not advise..)
So for my Sunday Favourites today I wanted to show you three great base coats I have used or am using and tell you what I like about them.

First of all, I would recommend always using a base coat when painting your nails, no matter what kind it is. If you don't, the polish you are wearing is likely to stain your nails (especially blue colours like to do this), which makes not wearing any polish no fun at all because your nails look all dirty and disgusting.
Even if a polish doesn't stain your nail, it's good to use a base coat to create a nice canvas for your colour. I always feel better when putting one on, even though I buff my nails and try to make them an even surface, I don't like to overdo it and a base coat will even out any ridges I might still have.


The first one I have used and liked is Essie Grow Stronger. I can't really say I felt a difference in the strength of my nails, but it's a great base coat as is evens out the nail and also dries really quick, so you can start your actual mani asap!


Another one from Essie is Help Me Grow. Again, I can't really say it helped my nails grow faster, but it's a great base for your mani as like with the one mentioned before, it dries really fast. Ain't nobody got time to wait for that base coat to dry!


My favourite one, which I have been using all the time since I got it, is OPI NailEnvy in the original formula. I believe there are a few different kinds of NailEnvy polishes out there for different problems you might have with your nails (brittle, dry etc.) but this one works great for me!
It dries in a flash and also with this one, I can tell my nails do grow faster than they normally would, which is great when you have had a break and want to get your nails back to the same length. 
I'm running low on my bottle but will finish my Essie Help Me Grow before I repurchase this, as I still have loads left of that.

All in all, remember to use a base coat to take care of your nails and create lovely manicures :)

If you have any questions or would like to recommend a great base coat to me that you love, be sure to drop me a comment!

Lots of Love,
Glittr

Saturday, June 28, 2014

Tutorial: Greige and Holo Purple Chevrons


Hey everyone,

I made a little tutorial for my half-chevron nails and I thought I would share it with you today! 

For this look I used 

  • Barry M Matte nailpolish in Vanilla
  • Catrice Cosmetics purple holo nailpolish in Plum Me Up, Scotty
  • mini chevron nailvilys by @teismom purchased from www.nailvinyls.com
  • round silver studs by Pueen I purchased on Amazon
  • nailpolish remover for clean up
  • nailpolish corrector pen
  • Glisten and Glow HKgirl Topcoat


First I painted all my nails with two coates of Barry M Matte nail polish in Vanilla. Then I put on my HKgirl topcoat. I let this dry (at least for half an hour, so I don't peel it off again when sticking on and removing the nailvinyls) and then started with the full chevron nail. For this I placed some nailvinyls all over the nail (starting from the bottom) and painted over them with the purple holo polish.


I removed the nailvinyls as soon as I had put on the holo polish, this way the polish doesn't dry and pulls strings of polish when removing them. Also I am very careful removing them and follow the line of the sticker in the chevron pattern. Then I cleaned up around the nail and put another coat of topcoat on.


For my half chevron nail, I first placed some striping tape down my middle nail:


Then I placed the chevron stickers, going from the middle where the tape is to the outer side of my nail. I overlapped the nailvinyls onto the striping tape to create a seamless pattern:


Then I painted over the side of the nail where I placed the chevrons with the purple holo polish, removed first the chevron stickers and then the striping tape down the middle. Always take off the sticker/tape you put on last first, so you don't lift up any of the other stickers. This is what it looked like after removing all the nailvinyls and the striping tape:


Then I cleaned up around my nails and they looked somewhat like this:


Next I put a layer of HKgirl topcoat over my middle nail with the half chevron and started placing some round silver studs down the middle.
To place the studs I spilled some out on the table and turned them the right way up (the way they are supposed to go on my nail), then picked them up with tweezers to place them on the nail. I hold them at level with my nail and try to aim at the spot where I want to place them and then kind of let them drop onto the nail. This way I can still carefully move them if they are not exactly where I want them. As soon as they are positioned right, I slightly press down on them very carefully to set them.


I tried to cover up the line I created with the chevrons, so you don't see it anymore. When I placed all the studs it looked something like this:


I didn't put any extra topcoat on anymore, as I placed the studs when my topcoat was still wet. I will admit using some kind of nail glue would probably keep them on a bit longer, but I don't have any so this will have to do for me ;)

Sadly you can't see how gorgeous the purple holo polish is, it was a limited edition and it's the only holo I own!

Here is the finished look, I hope you enjoyed my little tutorial and found it helpful. If you have any questions, drop me a comment and I will try and answer them :)

Lots of Love,
Glittr


Thursday, June 26, 2014

Comparison Swatch: Pink Polishes

Hey everyone,

as you might have guessed by now, pink is one of my favourite colours, especially when it comes to nail polish. Therefore I thought I'd show you a few of the pink toned polishes I have to compare them. Maybe you've always wondered what the consistency, opacity and similarity of one particular polish to another polish is? I might be able to show you some in this post :)


First up, I got out some of my OPI pinks. 

On my pointer finger I'm wearing OPI's Mod About You, which is one of my fave pinks of all time! It's very creamy and opaque, I put on two medium coats to achieve the opacity you see in the picture, you could also do three thin coats. In any case, application is so smooth, it's amazing!

On my middle finger you can see I Theodora You from the Wizard of Oz Collection. I don't tend to wear this one much, although it is a beautiful shade! A pretty sheer, but lovely nude-y pink that is very work appropriate or would also look beautiful for a wedding mani (being a guest or the bride!). I put on three coats to get the opacity you see in the pic.

On my ring finger I'm sporting Pinking Of You which has a bit more pink in it than I Theodora You, but is of the same consistency. Here also shown in three thin coats. It is a very pretty shade, but I think it doesn't suit my skin tone very well, so I don't tend to reach for it that often.

Lastly I have Chic From Ears To Tails on my pinky, this one is from the Minnie Mouse Collection. The consistency is a bit more opaque than the Pinking Of You and I Theodora You, still I had to put on three coates to achieve full opacity and a non streaky look. You can't see well in the picture, but it has a very, VERY subtle shimmer to it. 


For my Cinderella hand, I pulled some of my Essie pinks:

On my pinky I have two coats of Off The Shoulder, a lovely vibrant pink. This was one of the first Essie polishes I ever bought, ages ago! It really pops and makes you look nice and tan, too! It's very opaque and if you apply carefully, it could even be a one coater!

On my ring finger I'm wearing Lovie Dovie, which is one of the cutest polish names ever, in my opinion ;) It's a really pretty Barbie pink, shown here are two creamy coats. This one also really pops and gives you that tan look on your hands!

On my middle finger you can see three coats of Need A Vacation, a gorgeous creamy pink. In the bottle you would think that the consistency is like the two polishes before, but I feel I need three coats so you don't see any streaks. It's a gorgeous shade though!!

Finally, I have one of my faves, Romper Room, on my pointer finger. This is three coats, I will say application is a bitch with this one, I mentioned this in my post comparing this one to Essie Fiji, you can read about it here. It's not one of my best swatches you see in this pic, as my pointer finger is all crooked after breaking off a corner and still growing it back.. Still, it's one of my absolute favourites from all my pinks, a gorgeous, milky white, opaque baby pink.


I made my bf take a picture of both of my hands (bet you were wondering how I did that ;) so you could see them in all their glory! Please excuse my weirdly crooked left ring finger, no idea why it is doing what it is doing there! :D

I have to say, these are only a few of the pink polishes I own... there are quite a few more! Let me know if you would like to see more comparisons and if there is any information I should add about the individual polishes!

Down below you can see a few manicures I used some of the above mentioned polishes for. I hope you enjoyed my comparisons! :)

Lots of Love,
Glittr


OPI - Mod About You

Essie - Lovie Dovie

Essie - Need A Vacation

Essie - Romper Room


Sunday, June 22, 2014

Sunday Favourites: Nail Care Edition

Hey everyone,

I asked you guys on my Instagram @Glittr if you had any blopost requests, and you asked me to show you my favourite products to use for my nail care. So here they are! :)


BlissKiss Pure NailOil

First up are cuticle oils, my holy grail oil is the BlissKiss Pure NailOil from @simplenailarttips I bought from www.NailCareHQ.com - it is hands down the most lovely product I own for my nails!!
Ana from NailCareHQ recommends doing a 3 day treatment where you only slather this on your nails to get them back to a proper condition if your nails are really damaged and then use it every day, also on polished nails (in this case obviously around your cuticles). Unfortunately the glass polish bottles have been discontinued, they now come in plastic bottles. The product however is just as awesome, no matter the packaging! :) 

I have a whole blogpost on the BlissKiss NailOil and you can read about it here.


Essie Apricot Cuticle Oil

Another cuticle oil I use is Essie Apricot Cuticle Oil. I mostly use this for my toes, because I don't like them very much and don't want to waste my BlissKiss on them :D Also I use it on my hands/cuticles after doing a mani to moisturise the skin before I take a picture. It's a lovely oil with a really nice apricot scent and it leaves your cuticles very smooth and well oiled. It doesn't sink in as nicely as the BlissKiss, therefore for me it is my second choice when it comes to cuticle oil. Nonetheless it's a great products and I would happily recommend it to anyone who is looking for a good cuticle oil! 


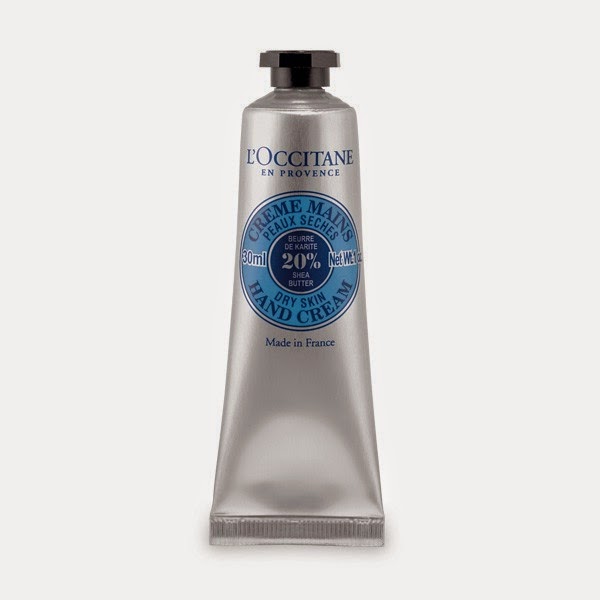
L'Occitane Shea Butter Hand Cream

Moving on to hand lotions, I'm not too specific about using any special ones. I do have some favourites though! One of them is the L'Occitane Shea Butter Hand Cream. It's supposed to be non-scented, which it pretty much is, but still it has a very nice, clean, shea butter scent to it. What I also like about it is that it moisturises your hands without leaving them sticky or feeling dry, I hate it when hand creams do that! These normally advertise that they sink in fast to leave non-greasy hands, but for me they just make my hands not feel moisturised at all, even if they may work. The L'Occitane sinks in nicely but leaves a moisturised feel to your hands, but you will not be leaving greasy marks on everything you touch afterwards! ;)
It's a pricey little fella, but a little goes a long way with this one and so for me it's worth the money.


Neutrogena Nordic Berry Hand Cream

Another hand cream I've really been loving over the past few months is the Neutrogena Nordic Berry Handcream. I don't know if you can buy this everywhere, although Neutrogena is a widely spread brand. I bought it at the drugstore and it's a cheap alternative to the L'Occitane one, because it has all the same good qualities. 
The L'Occitane is probably a wee bit thicker than this one, but the Neutrogena really is a pretty solid hand cream it would happily recommend. I've already gone through four tubes of this and I really like it, but I need to switch it up because I can't stand the smell anymore! :D Don't get me wrong, it smells lovely!! But I tend to get sick of some smells after some time so I am now using up some other hand lotions I found while cleaning up my beauty product stash ;)


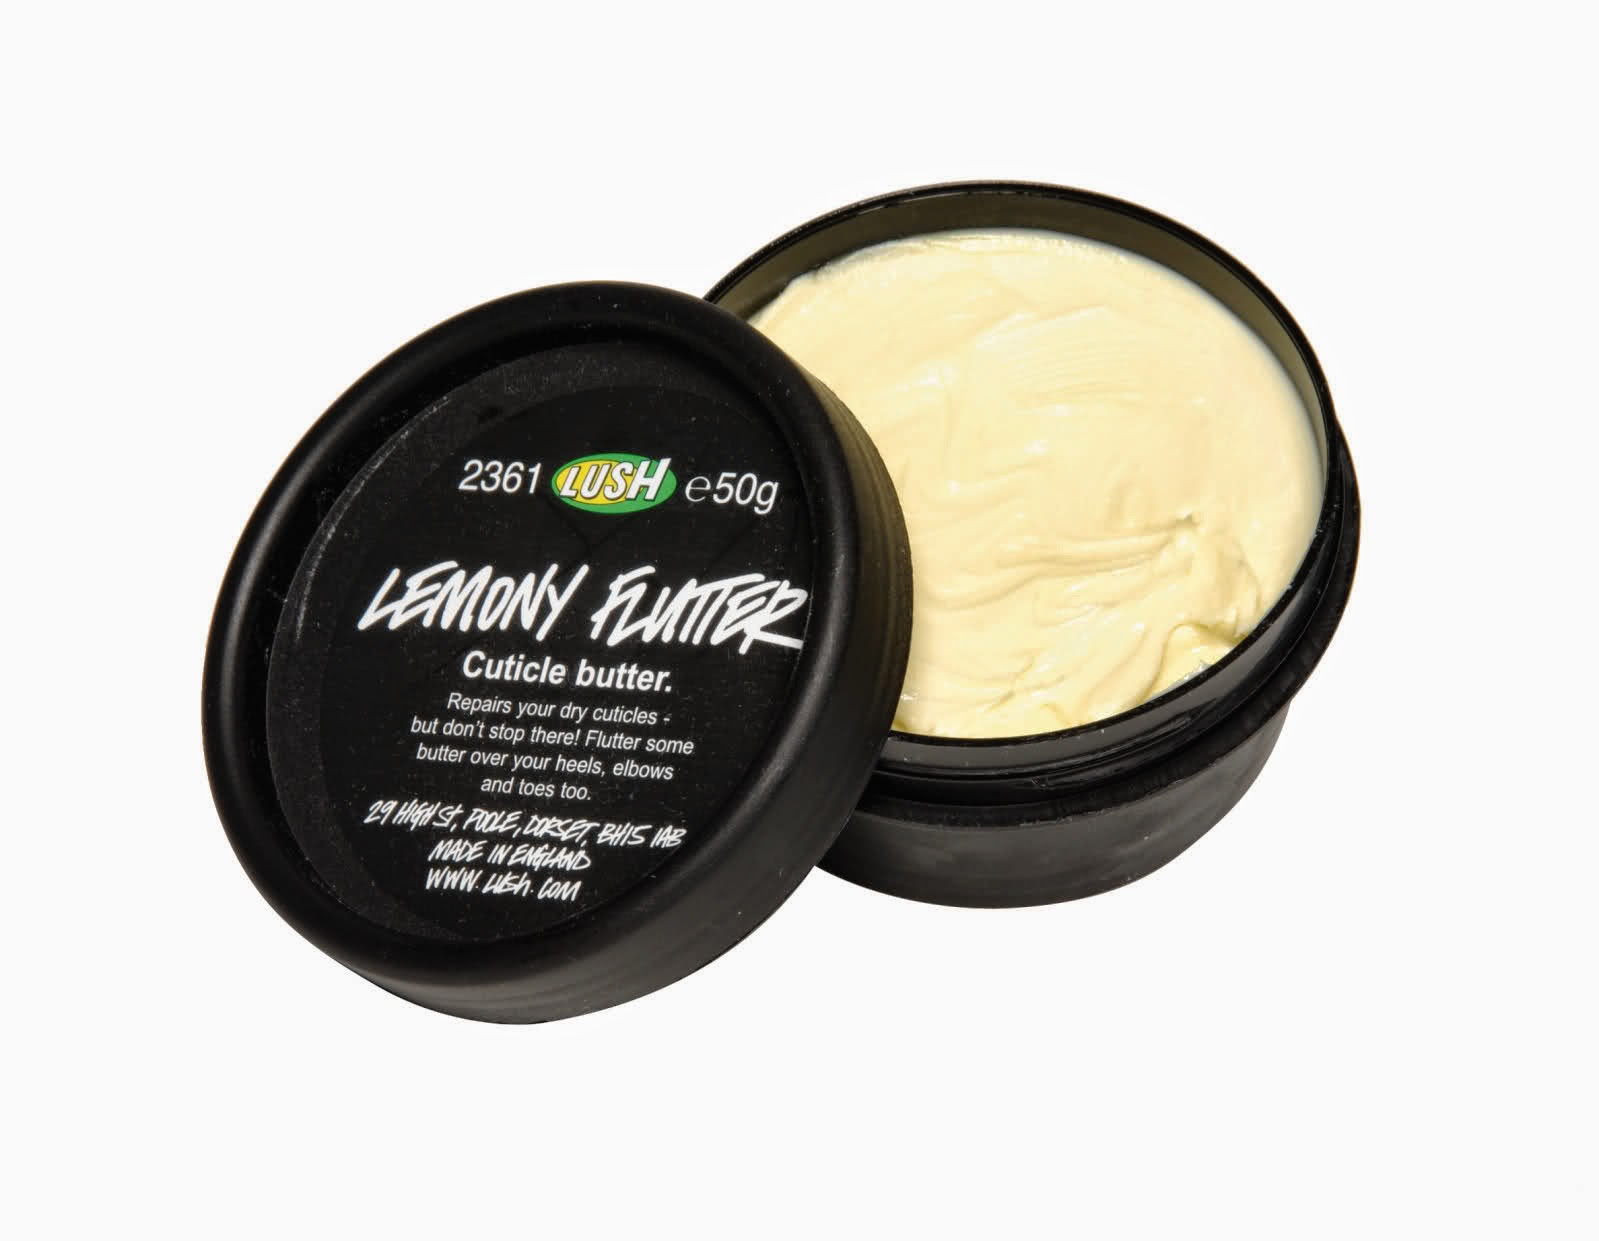
Lush Lemony Flutter Cuticle Butter

Another way of taking care of your hands are cuticle balms/creams One product I really enjoy using is the LUSH Lemony Flutter Cuticle Butter. It smells divine, very citrussy obviously ;) I moisturise it around my cuticles before bedtime sometimes and it really smoothes the skin and takes care of any dryness! I will say it's not cheap though.. But in this case, one tube will last you forever!!
Two other great cuticle balms for on the go are the BurtsBees Cuticles Balm and the GlistenAndGlow Nail and Cuticle Balm. They're both perfect to pop in your handbag and use whenever you need them. Also, they both smell amazing! :)


Orly Cutique Cuticle Remover

Something else I like to use (this is especially for my toenails because I don't really have any excessive cuticle growth on my fingernails) is Orly Cutique. I saw this product in Nailit Mag in an article about pedicures and I was curious to try because my toenails just look horrific and nothing I have tried before has worked (i.e.: putting on cuticle oil and then carefully pushing back the cuticles). 
This stuff really worked for me, you just put it on the nail, let it sit for a bit and then carefully scrape off the excess cuticle that has grown over your nail (which the Cutique has now softened) with a rosewood stick or some other tool that does the job. 
It's also supposed to be a stain remover, I haven't really seen a difference in the colour of my toenails but I always put polish on to cover them up anyway. After taking off all the excess cuticle and slathering them with the Essie Oil, I didn't hate my toes as much as before and I could actually show them wearing flip-flops, so that is a huge difference to me! 
There are probably many other cuticle removers out there, but this is the only one I've tried so far and I trust it will last me a while too :)


my nail care tools

These are the tools I use for my nail care:

  • I have no idea what you call the blue tool at the top, but it's to remove hard skin around your nails. I have quite a lot of that around my fingernails and I can't soften it with oil, so this tool is a life saver for me!! It has a sharp forked end with which you can carefully cut away the hard skin. Be careful not to get carried away though, I've cut myself more than once removing that pesky skin there..
  • I saw this Revlon NailClipper in Nailit Mag too and immediately wanted it, it's a bit rounded which is better for the nails and it comes with a rubber case around it which you can remove, it collects the cut off nails so they don't go flying everywhere (gross!!) and you can just empty them out when you're done :) I use this only on my toes, because I only file my fingernails and never cut them.
  • Rosewood sticks are perfect for pushing back the cuticles on your nails, be it toes or fingers. I usually put on some cuticle oil, massage it in and let it sit for a while, then start pushing back the cuticles as much as needed.
  • The nail file pictured it actually crap, I bought it in a pack of two at boots at the airport trying to kill some time waiting for my flight and got sucked in by the cute design. When using it I noticed the pink colour comes off onto your nails.. thanks a lot! But in general, these are the kind of files I use, this one was just the only one that was not completely used and disgusting (don't want to put your eyes through that). I normally buy my nail files from the girl that used to give me my gel manicures, but as I no longer go I haven't bought a good file for a while, although I am in desperate need! The ones I normally use are from LCN, same brand as the blue tool of which I don't know the name ;)

So that is all for my favourite nail care products, I hope you enjoyed this post! If you have any questions or want to recommend any products I should try, drop me a comment! :)

Lots of Love,
Glittr


Thursday, June 12, 2014

Comparison Swatch: Light Pink Nails


Hey everyone,

when I decided to do my nails the other day, I wanted something simple and pretty. I didn't feel like doing any nail art, so I opted for a pretty polish color to wear on its own.
I chose Essie's Romper Room, which is a gorgeous pink shade. If you haven't guessed from my Instagram account yet, pink is my favorite color to wear on my nails ;) I think it's the color I own the most shades of too, especially Essie offers a beautiful range of different pinks (and I probably have nearly all of them...)! 

After I had chosen Romper Room, which I bought about two weeks ago but hadn't gotten around to trying yet, I thought it looked very similar to my favorite Essie polish shade (ever) Fiji. While I was looking at the two bottles in my hand, I couldn't really see a difference between the shades! So I thought to myself, why not do a comparison swatch to have a closer look and share them with you? :)

Here is Romper Room worn on its own, it's such a gorgeous, soft light pink! I will say it's a bitch to work with though, this took three coats! And I am not a fan of doing more than two for full opacity, but it being so gorgeous I can overlook that fact ;)


Now in this pic of my Cinderella Hand, I have Fiji on my middle finger and pinkie, on my index and ring finger I am wearing Romper Room. Don't know about you, but I do NOT see a difference!! I keep looking at my fingers and also looking at them in different lighting, but there is no way you can tell a difference on the nails!! 


But if you look at the bottles closely, you can see the slightest difference in shade. At least my camera picked it up in this shot.


Seeing them in this pic, I can again not tell the difference...


These colors really are scarily alike! 


I will say that my bottle of Fiji is probably a year old and I've heard that it changes color with time, and i can't be sure but I think it used to be a lot lighter. I do remember it being more white, that was the thing that I loved about it, it was nearly white with a hint of pink in it.
Romper Room definitely is more pink from the beginning, but I guess it's meant to be. 

So, you probably don't need both colors and from what I've read everywhere, you can't really get hold of Fiji that easily anymore. Essie also changed the formula and there seem to be three different hues of Fiji out there.. weird?! Anyway, I still like mine and I will finish it up, then I'll move on to Romper Room :) Down below there are more pics of my nails with Romper Room on them, I sure love a simple pink manicure sometimes!

Let me know if you would like to see some more comparison swatches!

Lots of love,
Glittr

Sunday, June 8, 2014

Sunday Favorites

Hey everyone,

it's Sunday again already so here are my favorites of the week! :)

I was pretty excited to get some more Nailvinyls this week, I saw some gorgeous French Tips the other day and it said they were done using the these, so I had to buy some for myself!! I got French Tips and also some different sized stripes, which always come in handy! I already have chevrons in every size, as well as stars and half moons, I just looove Nailvinyls! Go check out Linda's site to buy your own! They always work perfectly! Check her out on Instagram @teismom as well! :)


Also I gave in and treated myself to a new watch this week! My sister actually made me buy this, she got it for her own and asked for my opinion and I immediately fell in love with it. I got a rose gold necklace for christmas last year and I am really excited to have a matching watch now :) Although in my opinion you can pair rose gold with silver and normal gold too. It was also on sale and €100 cheaper than normally on Amazon, so I just couldn't say no ;)


This next thing has been sort of a favourite for over a year now, but I still wanted to stick it in here because I use and love this every day! 
I use Bioderma to remove my eye makeup every day and it works amazingly. On Friday night I had to take off quite a lot of eye makeup because I had been to a party and put on more than my usual every day coat of mascara. I just soaked a cotton pad with Bioderma and held it over my eye for about 10 seconds, then gently wiped it and it took everything off in one go! I do go over it again for good measure, but if you're really tired you could skip that ;) 
I buy mine off Amazon as I can't buy it anywhere around me in shops, from what I've heard you can only buy it in french pharmacies. It's great for sensitive skin and eyes (which is so me) and I have never had any complaints about it :)
This is the baby bottle I use for travelling in the picture, for everyday use I have a big daddy-sized bottle which lasts me about 8-9 months, maybe even longer! The only downside is that could can't screw off the lids to refill the baby bottle with the big one and reuse it. So you have to buy and new one when you run out. But as I said, with this stuff a little goes a long way and it lasts forever!


When I got my watch this week, it immediately reminded me of one of my favourite polishes of all time, Essie Penny Talk! It's a gorgeous colour and it looks so elegant! I swatched it to show you and then saw that the colour doesn't look anything like in the bottle once you have it on your nails, I never noticed that! Totally gold in the bottle, rose gold on the nails! Maybe it was the lighting or my camera, but I still like the look of both ;)


Last but not least, my favourite cat pic of the week has to be this one with my little munchkin sitting in my light box!! ;)
She loooves to sleep on our desk chairs, and we always put a towel or something on them when we're not using them so we don't have to sit in a cat hair trap when we need to use them. But when both were occupied, she went to look for a new sleeping spot.. ;) I really need to clean my light box now, good thing I can take out the black background and just put it back in after I've cleaned it!


I hope you're having a lovely Sunday, I sure am! :)
Let me know if you have any favourites for this week or tell me what you've been loving in general, I'd love to know!

Lots of love,
Glittr

Wednesday, June 4, 2014

Tutorial: Pink Watermarble


Hey everyone,

so I attempted some water marble nail art and I'm pretty pleased with how it came out! :) Let me tell you, I am the worst at marbling, but after lots of trial and error and reading through loads of other blogposts and watching tutorials, I decided to give it another try. And it was worth it!

I'm putting it out there now, I am no expert (obviously) but I thought I'd share everything I learnt about watermarbling and maybe help some of you :) Here we go!

For the look I went with you will need:

  • three different nail polish colors, I used Essie Romper Room and Boom Boom Room as well as OPI Alpine Snow
  • some tissues
  • toothpicks
  • small glass/cup 
  • some distilled/filtered water
  • scotch tape
  • Q-Tips
  • Nailpolish corrector pen or brush
  • nailpolish remover

I start by painting my nails one coat of white. This will make the colors pop and give them a good base. For this I used white, but you could also use one of the colors you are marbling with. Then I tape around my nail to prevent having to do too much clean-up. Your nail should look something like this ;)


Then I prepare the marbling pattern i want to create on my nails. Put some filtered or distilled water in your glass, fill it up until it's pretty much full, this makes it easier to dip in your nails because you won't have to dip down too far. I use water that collects in a portable air filter that we have in our cellar and it works perfectly. I've put some in an old water bottle to use when I need some. The water should be room temperature, marbling won't work if it's too warm or too cold (believe me, I've tried both..)! Just let it sit for a day or two and it will be ok to use.
If you do this, remember to label the bottle with what's inside and keep it away safe, so no one drinks from it!! 

First I do the bullseye by putting drops of polish in the water, alternating between my two pink shades. When I feel I've made enough rings (about 10-12 drops all in all) I have my bullseye:


I used to get really cross because my bullseye never spread properly but always gravitated to one side (like this one) but I learnt it doesn't matter, because you can pull it in the direction you want it with your toothpicks. 

Now I stick a toothpick in the middle of the bullseye and pull it to one side, then I do the same and pull it to the other side, separating the bullseye in the middle. It doesn't matter if this is not perfect!


Then I pull a toothpick through the pattern from the other side, like so:


Then I pull the toothpick through from the other side:


I do this a few times, alternating the sides. In the previous picture, I left a bit much space between the both drags, normally I try to make them thinner, like in this pic:


Thinner spaces in between gives the pattern the thin stripy look you see in the end result picture. When you have done this a few times, your marble should look like this:


Now it's time to put that marble on your nail! Try and dip your nail in level with the water, so the design doesn't change shape. Dip your nail horizontally in the spot where you want it:


Now keep your finger underwater and clean up the rest of the polish on the surface, by dipping the toothpick in and collecting all the excess color. If the polish hasn't dried at the surface, you can speed up the process by blowing onto it so it dries quicker. When you have collected all the polish off the surface, you can carefully pull your nail out of the water. If there are any airbubbles around your nail, carefully pop them when you pull them out of the water. Do this slowly, so they don't ruin your design.

Your nail should now look like this :)


Carefully take off the tape, then carefully pat around your finger to dry off the water. Be careful not to come too close to you nail though! Then clean up around your nail with a Q-Tip dipped in nail polish remover or acetone. Then clean the edges with a brush dipped in acetone or like me, use a nail polish corrector pen.

Now repeat this step on all your nails and it should look something like this :)


One thing that really used to bug me, is that after doing one nail, there always seemed to be some flakes of residue floating about on the surface of the water. These would prevent the polish from spreading properly when I tried to create the next bullseye for the next nail. To take these flakes out of the water, I quickly run a cotton pad through the water to collect them. Sometimes I need to repeat this step but then the water is all clear to create another bullseye :)

I hope this was helpful to some of you! Please tag me on Instagram using the hashtag #heyglittr if you try this kind of watermarble after reading through my blogpost and are pleased with your result, I would love to hear if this was useful :) If you have any further questions, leave them in the comments below and I will try my best to answer them!

Thank you to everyone who helped me on my way to creating a lovely watermarble!! 

Down below are a few more pics of my pink water marble, I hope you like it as much as I do, I am really happy with them :)

Lots of love,
Glittr


 Color in the bottle shown above: Essie Romper Room
Color in the bottle shown above: Essie Boom Boom Room